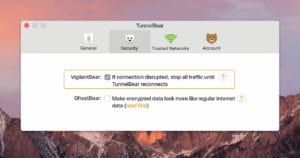
 When you hear the words “Internet kill switch” it can bring up negative thoughts of governments cutting Internet access. That isn’t the case at all with TunnelBear’s latest addition to their popular VPN service. The new feature is called “Vigilant” and it acts as a kill switch anytime your connection drops.
The new Vigilant feature is especially useful for those who travel or use public wifi around town. It would even come in useful at my house as we have ISP and network issues from time to time. With the new Vigilant feature from TunnelBear my unsecured online activities would be stopped until reconnected.
How does TunnelBear’s Internet kill switch (Vigilant) work?
From the associated TunnelBear blog post:
It’s a new OSX/PC feature we call “Vigilant” that is designed to keep your location and data private in the brief seconds while TunnelBear is connecting and reconnecting.
I refer to Vigilant as an Internet kill switch because that’s what it does. It blocks all unsecured traffic until TunnelBear is connected. In the case of a dropped connection it will block all unsecured traffic until TunnelBear reconnects to the server.
How do you set up Vigilant?
First I should mention that the TunnelBear team has added the new Vigilant feature to both their Windows and Mac clients. You can enable the feature in either software by going to the “General” section of the “Preferences” menu. From there simply check the box next to “Vigilant” to enable the feature.

I also suggest you check out TunnelBear’s intelliBear and Maul Trackers features. You can use intelliBear to tunnel specific websites through the service and Maul Trackers to help block companies from collecting your personal information.
Vigilant is the fourth new client feature TunnelBear has released since the beginning of March. At the same time they added support for Linux and a server location in the Netherlands. I’d say that’s a pretty busy few weeks. I look forward to seeing and sharing where the TunnelBear team heads next.
