![]() The Brave browser is an open source project developed by Brave Software. Instead of using ad blocker extensions, Brave built their browser from the ground up. The goal of the Brave browser is to replace ads and trackers that slow the internet down with cleaner ads. Currently, the browser is available for Windows, Mac OS X, Linux, iOS, and Android.
The Brave browser is an open source project developed by Brave Software. Instead of using ad blocker extensions, Brave built their browser from the ground up. The goal of the Brave browser is to replace ads and trackers that slow the internet down with cleaner ads. Currently, the browser is available for Windows, Mac OS X, Linux, iOS, and Android.
Because of the way it is designed, Brave browser eliminates the need to use multiple ad and tracker blockers. It is also integrated with the HTTPS Everywhere software project from the Electronic Frontier Foundation. What that does is encrypt your data when you use common sites that are not normally encrypted. In this review, we are going to show you how to download, install, and use the Brave browser.
Brave Browser Funding
The Brave browser allows some ads to come through and they ask for donations. However, the ads can be turned off completely. Most of their funding comes from publishers and users that want to donate to the cause. The Brave software team states that site publishers can expect a better deal because of micro payments made to the sites. They do not subscribe to the Acceptable Ads Program, but they do use some of the same guidelines.
Brave Browser for Windows
Since the Brave browser is standalone software instead of a browser extension, we will show you how to install it on Windows. Start by going to www.brave.com/downloads. You will now see the page below. Choose whichever version of Windows you want, whether 32-bit or 64-bit.
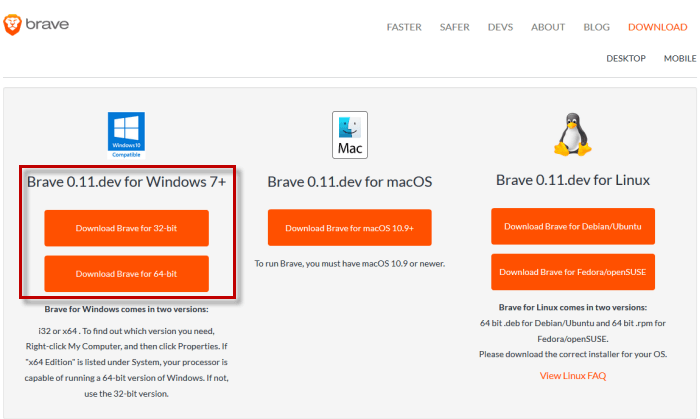

Now, click on save file. You will see a message pop up on your screen telling you the software is being installed.

As it tells you in the image above, the Brave browser will open when the installation is complete. As you see below, your Brave browser is open and ready for use.
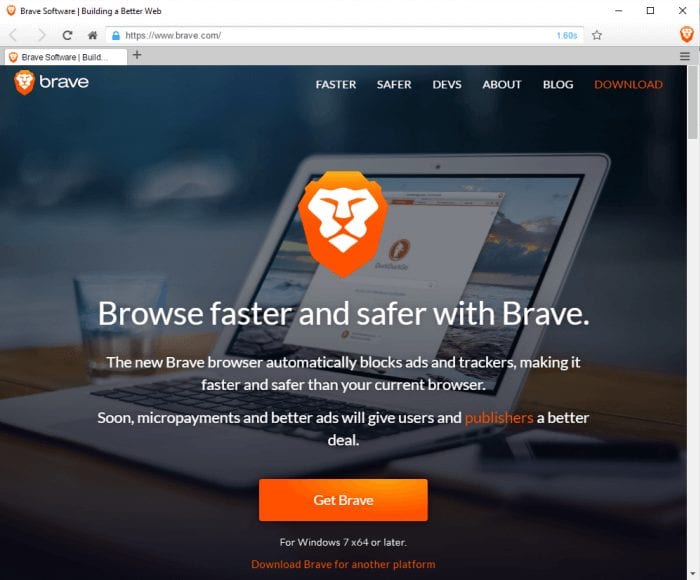

Brave operates like any other browser would, but we will show you the features and where they are located.
How to Use Brave Browser for Windows
The Brave browser team makes it a point to mention the speed of their browser, and it is fast. As you see in the red box below, the browser shows how long it takes the page to load. The green arrow in this image points to the lion icon.
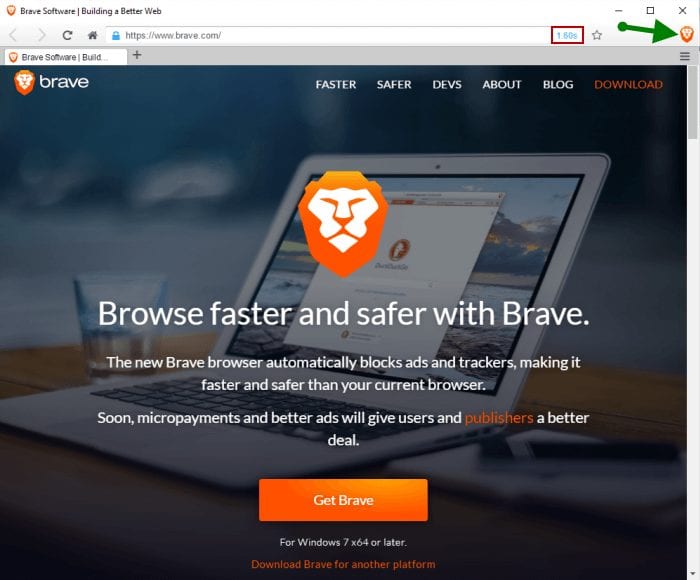

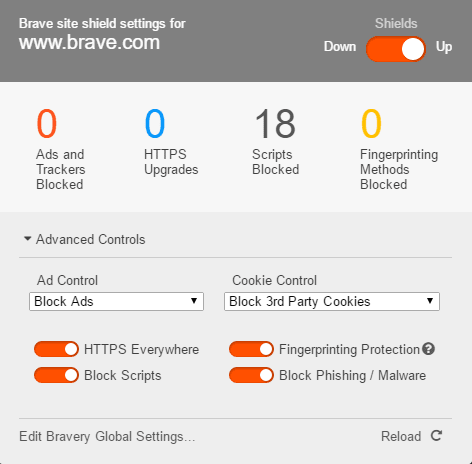
Click the lion icon to bring up the Bravery panel. Here, you can tweak the advanced controls shown below by using the sliders. It will also tell you about the ads, trackers, scripts, and fingerprinting methods blocked. You can turn off the protection here by moving the slider from shields up to shields down.

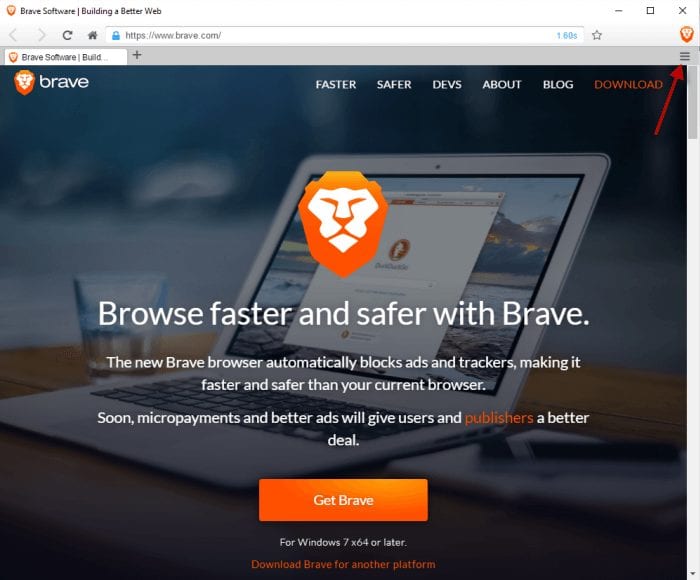
You can change other settings in the browser. The red arrow below points to the menu icon. Click on it, and select settings.

Now, we will go over the six tabs located under the settings heading. At the top of the screen, you can see it is called preferences. Let’s go over the settings in each section.
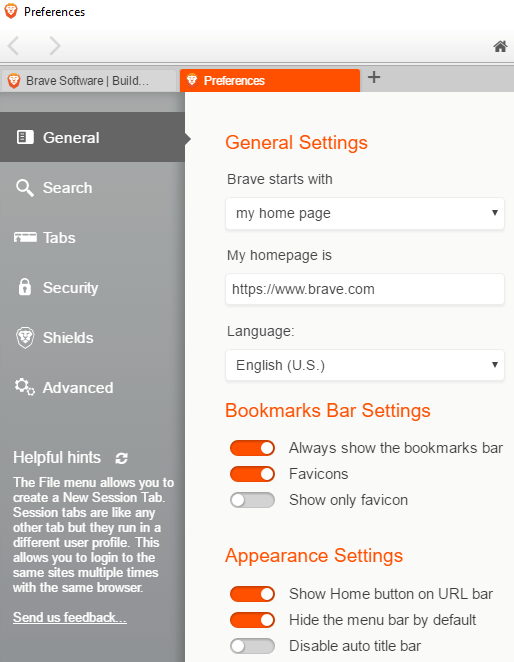

General – On this tab, you can determine what page you want the browser to start on. You can also set the homepage and language you want to use. When you have bookmarks, you can put them on the bookmarks bar, and decide how you want them displayed through the use of sliders. Some appearance settings are also available to set. Unlike other browsers that make some of these options difficult to find or use, the Brave browser does a great job of making it easy for the average user.
Search – Under this tab, you set which search engine you want as your default search. You can choose Amazon, Bing, DuckDuckGo, Google, Twitter, Wikipedia, Yahoo, and Youtube. You can also choose location bar settings on this tab.
Tabs – You can set the number of tabs you want displayed at one time, whether or not you want tab previews on hover, and if you want them to be the same color as your theme.
Security – One of the most important headings on the page. This is where you can choose to clear browsing history, download history, cached images and files, and site cookies when you close the browser. You can tell the browser how to manage the passwords, whether you choose to use the built in manager or your own. Do Not track is the next option under this heading. You can choose to send a Do Not Track header with browsing requests. The last option in this section is for plugin settings. Moving the slider will enable Adobe Flash support.
Shields – The settings located on this tab are the same ones in the Bravery panel above.
Advanced – As you might guess, the settings on this tab are more technical. Here, you set the default zoom level, hardware acceleration, whether or not you want to use the HTML5 PDF reader, and if you want to enable smooth scrolling.
Those are all the settings for the Brave browser. Now, we will take a look at a webpage using the Brave browser. Since we can toggle the protection on and off, we’ll show you the differences.
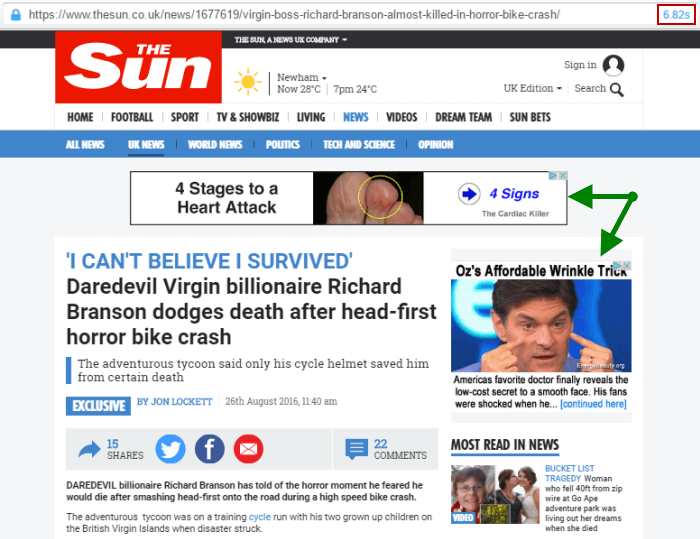
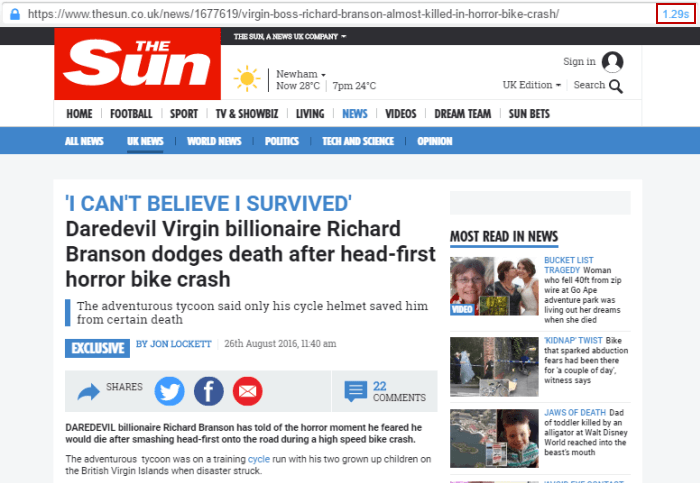
The image below shows a webpage with the Brave shields down. You can see the ads here, as shown by the green arrows. Another interesting part of this picture is shown in the red box at the top. You can see the page takes 6.82 seconds to load on a high speed connection.


And that is what the Brave browser looks like for the Windows operating system.
Brave Browser for Android
Brave for Android mobile devices is completely different than the desktop version. In the Android version, it is called Brave Browser – Link Bubble. To start this process, go to the Google Play store and type in Brave browser. Find Brave Browser – Link Bubble and tap on it. Next, click on accept and you will see the 3rd screen with the bubble up top.
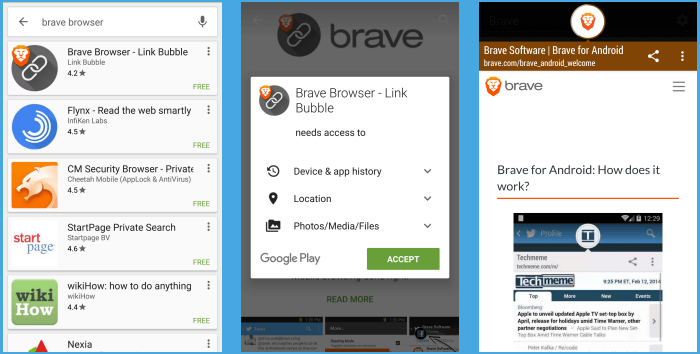

After getting to that screen, click on the three vertical dots on the right side. Click on them and select close bubble. You will be taken back to your normal screen, so tap on the Brave icon you see in the center image. On the next screen, tap OK. You must enable Brave Browser as your primary browser for it to work.
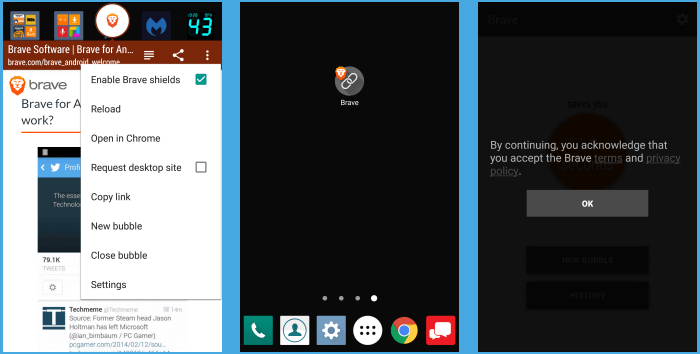

The start screen is shown in the first image below. Tap on new bubble and type in the address. You will then see the website icon appear in the bubble. By tapping on the three dots, you can click on various different options and make sure the shields are enabled.
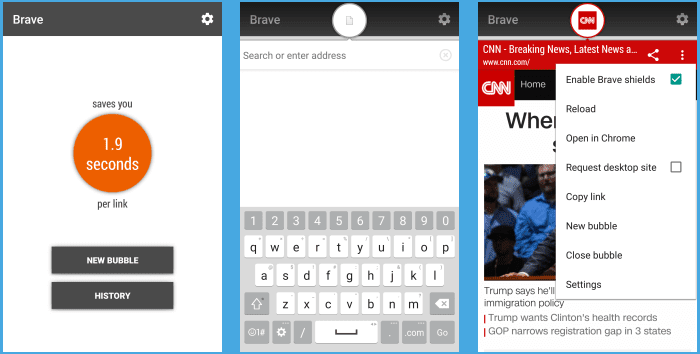

And that is all there is to the Android version. The Brave Browser – Link Bubble takes some getting used to, but it works. Keep in mind that Brave is still very new, so changes are likely to be made.
Why Use Brave Browser?
Brave browser does a good job of blocking ads which will in turn speed up the time it takes to load sites. Speed and data usage is especially important to mobile users. We are glad to see that they work with the EFF and use one of their technologies.
Conclusion
In conclusion, we like the way Brave browser operates. You can still leave ads on within the blocker to support their cause or you can block everything if you want. It is nice to have a browser with ad blockers built in so you do not have to download additional apps. Though it works well, you should use additional tools like a VPN to protect your privacy.

