![]() You can go directly to iTunes or visit their site to find the latest release of the StrongVPN iOS app. If you decide to start on the StrongVPN site, simply click on “Setup” in the main menu and then the “StrongVPN for iOS” button. This will take you to the Apple iTunes store where you can download the app and install it. This app is compatible with iOS 8.4 or later. The client setup page also has manual setup guides to configure various iOS versions 5 to 9 to use their service with L2TP, PPTP, IPSec, and OpenVPN.
You can go directly to iTunes or visit their site to find the latest release of the StrongVPN iOS app. If you decide to start on the StrongVPN site, simply click on “Setup” in the main menu and then the “StrongVPN for iOS” button. This will take you to the Apple iTunes store where you can download the app and install it. This app is compatible with iOS 8.4 or later. The client setup page also has manual setup guides to configure various iOS versions 5 to 9 to use their service with L2TP, PPTP, IPSec, and OpenVPN.
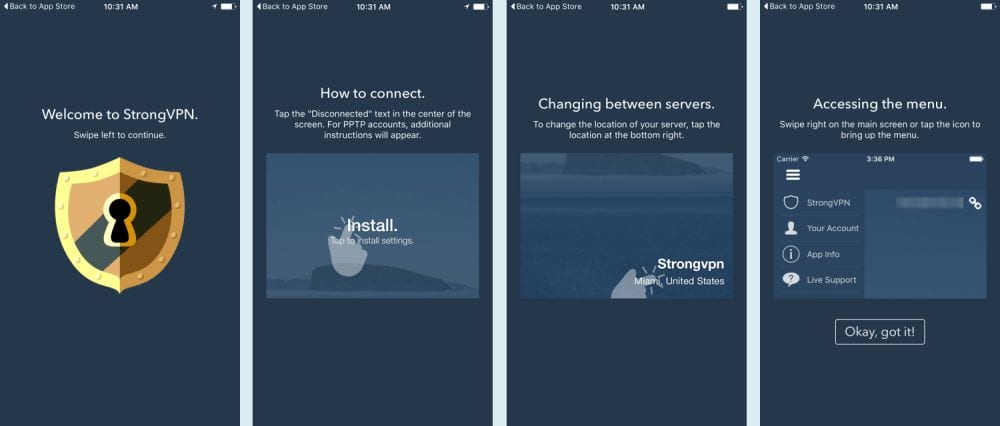
The first time the app launches it will display a short tutorial. The first screen welcomes you and tells you to swipe left to continue with the tutorial. When you first login to the app you will need to install some settings. This is shown in the second screenshot below. After looking at this screen, swipe left again to continue with the tutorial. The third screen tells you how to switch locations using the app. Swipe left once more and you will see a brief overview of how to access the menu.
After you are through viewing this tutorial, tap on the “Okay, got it” button to continue with the app setup. This will bring up an authentication screen like the one shown in the image below left. You need to enter your “Email address” and “Password” that you created when you signed up for the account. You can find the information in your welcoming email. Once you have these properly entered, toggle the “Stay Signed In” switch so that you will not have to re-enter this information. Finally, tap the “Sign In” button to verify and save your login.
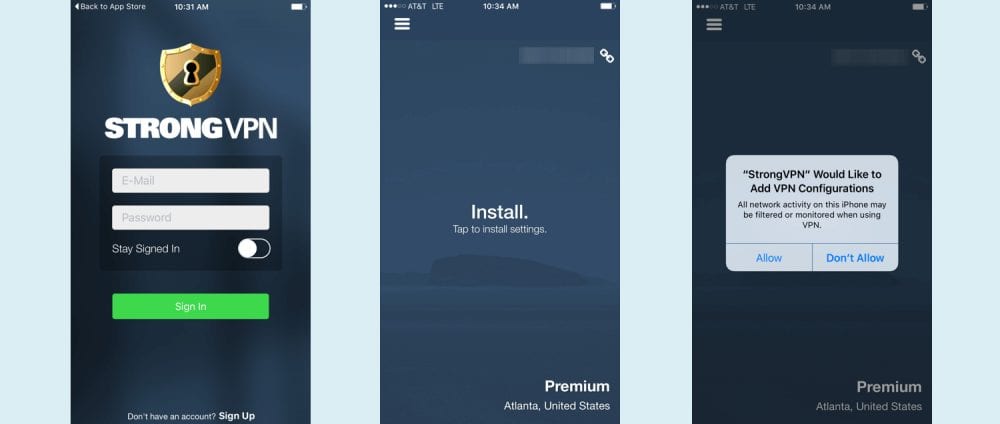
This will display a screen like that shown in the middle above. From the tutorial, you should know to tap the center to install the StrongVPN settings. After you tap on “Install”, you will see a screen like that shown on the right above. This is an informational screen from your iOS device letting you know that you are giving StrongVPN access to all of your Internet traffic. Tap on “Allow” so that the app installation can finish. Depending on your device settings, you may have to enter the device unlock password to approve this.
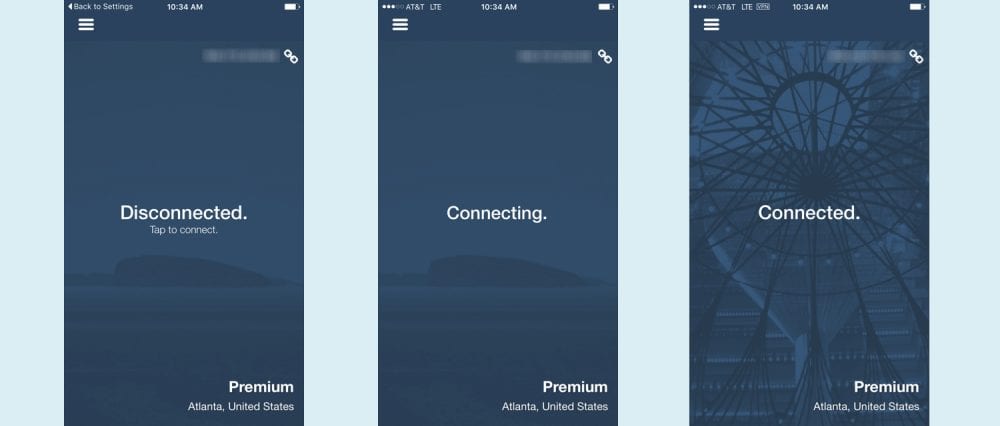
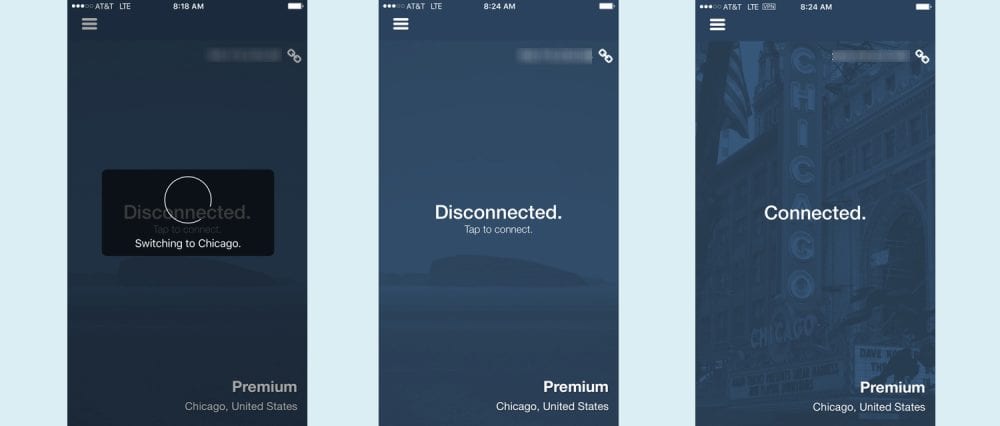
You will see a screen like the one shown on the left below once the setup is complete. This is the main client screen in its disconnected state. You will notice your public IP address shown at the top of the screen. The center area of the screen says , “Disconnected”. Tap the center of the screen to start the connection process to the Atlanta server. The center screen, whose center area now says, “Connecting” lets you know that you have started the connection process. Connecting to a server in Atlanta will change your IP address and secure your data. Also you will notice that the background will change for the current location once the connection completes.
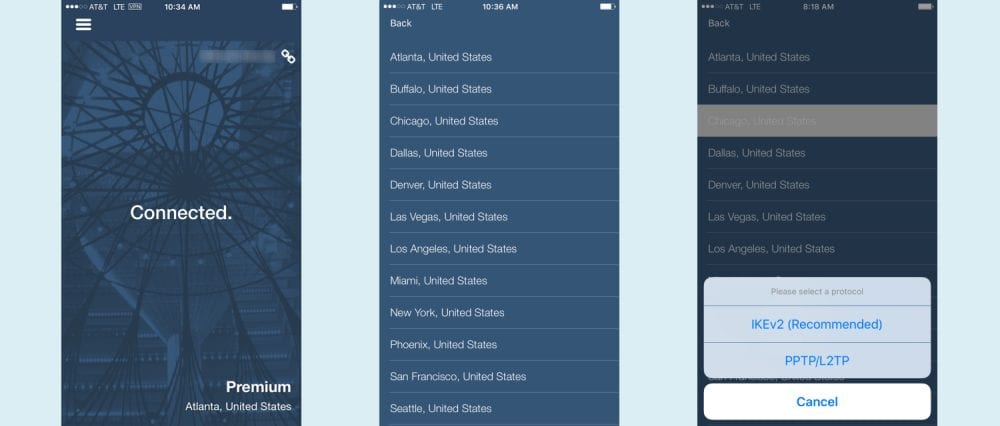
It could not be any simpler to connect to the StrongVPN network using the iOS app. Once you have a location, simply tap on the center of the screen to connect to it. But, how do you chose a different location? From the tutorial, you should know that all you have to do is tap on the current location at the bottom right of the screen to display the location list. This list is shown below-center. Selecting a new location like Chicago will allow you to choose your protocol.
We recommend that you use the IKEv2 protocol for all of your iPhone or iPad connections because it supports Mobile IKE (MOBIKE). Mobile devices work very well with IKEv2. It will try and reconnect when you switch from your cellular network to home Wi-Fi without dropping your current VPN session. Thus it is ideal for devices like the iPhone and iPad. Be aware that you will have to do some extra setup if you choose PPTP/L2TP for your chosen location.
Assuming that you have tapped on the recommended IKEv2 protocol, you will see a screen like the one shown below left. The connection to Atlanta is being disconnected so you can switch to a VPN server in Chicago. Simply tap on the center of the second image below to connect to your new Chicago location. The last image shows the completed connection. Notice you now have a virtual IP address assigned from the Chicago VPN server, the screen says, “Connected”. You will also notice that the background shows the old Chicago theater.
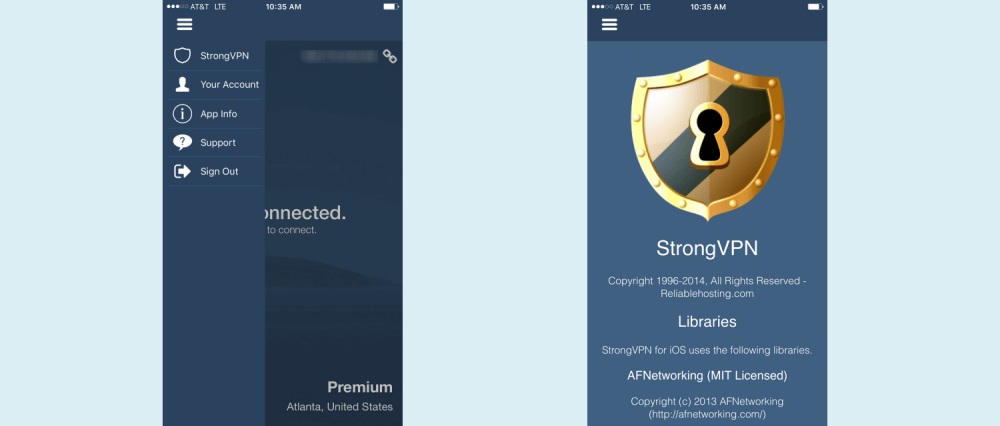
The last thing we want to examine is the StrongVPN app menu which you access by swiping right or tapping on the menu icon in the upper left of the screen. This menu is shown on the center-left below. This menu is very basic and consists of the following items:
- StrongVPN logo – For branding purposes.
- Your Account – This will show you your account number and is mostly for legacy accounts.
- App Info – This will display a screen like the one shown center-right below with information about the app and libraries that it uses.
- Support – This will open the support page of the StrongVPN website on your device so you can examine their FAQs or create a support ticket and send it to their staff.
- Sign out – This will log you out of the app.
The iOS app from StrongVPN is very easy to use. Just choose a location and tap on the center of the client screen. It uses the IKEv2 VPN protocol instead of OpenVPN and has the advantage of MOBIKE. This makes it ideal for mobile devices like the iPhone and iPad because it will attempt to reconnect if the session drops and allows you to switch between your home and cellular networks while maintaining your current VPN session.