![]() You can download the StrongVPN Android app directly from Google Play or visit their site first. If starting on StrongVPN.com, click on “Setup” from the site main menu and then on the “StrongVPN for Android” button on the screen that follows. This will take you to the Google Play store where you can download the app and install it. The client setup page also has manual setup guides to configure various Android versions to use their service with L2TP, PPTP, and OpenVPN.
You can download the StrongVPN Android app directly from Google Play or visit their site first. If starting on StrongVPN.com, click on “Setup” from the site main menu and then on the “StrongVPN for Android” button on the screen that follows. This will take you to the Google Play store where you can download the app and install it. The client setup page also has manual setup guides to configure various Android versions to use their service with L2TP, PPTP, and OpenVPN.
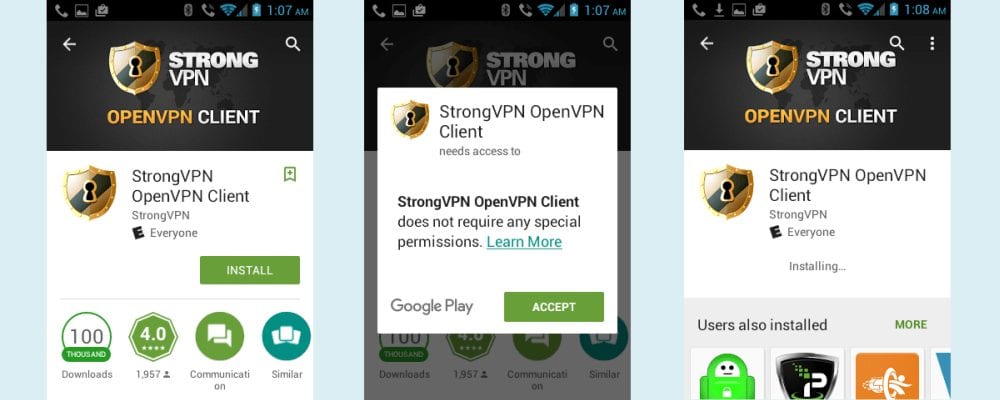
The procedure for installing the app on your Android device is illustrated above. Once you are at the Google Play store, tap on the “Install” button to begin the process. Accept the access message which appears by tapping the “Accept” button and wait. The client is compatible with Android 6 and below. Once the client is downloaded to your device, the normal procedure to open it will be to tap on the StrongVPN application icon. However, the first time you open it, just tap on the “Open” button like that shown in the first screen of the image below. This will then bring up the client authentication screen which is shown in the middle image.
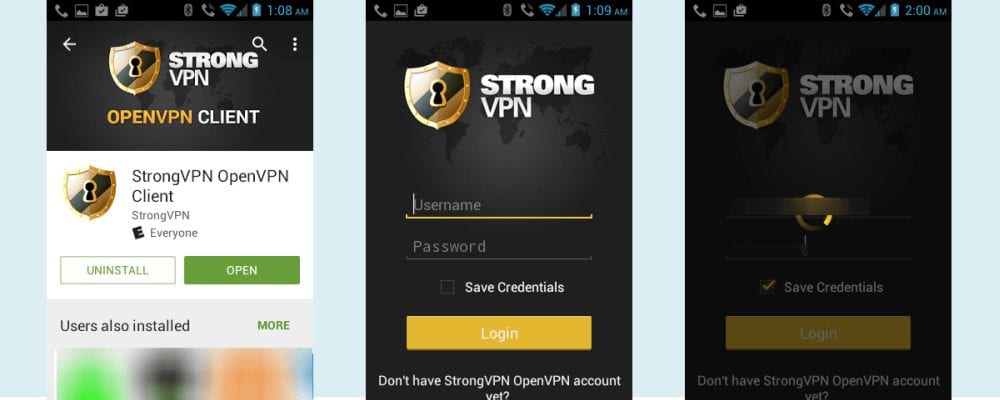
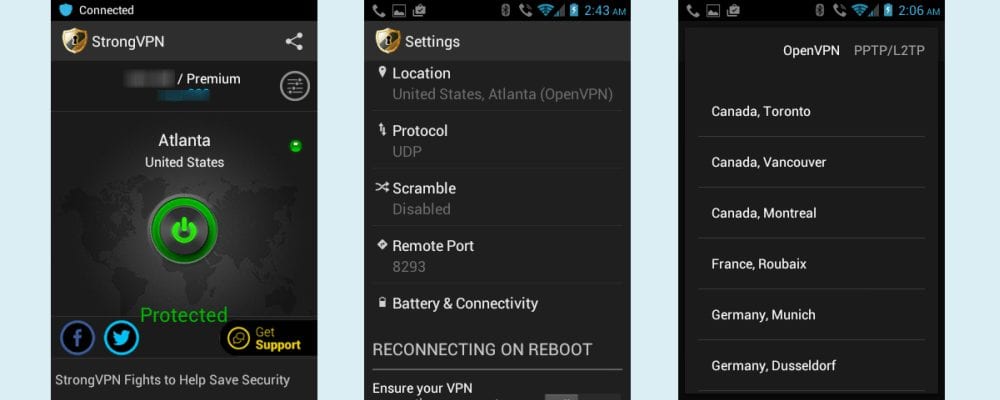
On the authentication screen, enter in your email address and password that you used when you created your account. These can also be found in your welcoming email that you received from StrongVPN when you subscribed. Tap the “Save Credentials” toggle so that the app will store your information, else you will have to type it in every time you connect to the StrongVPN network. Once you have correctly completed the aforementioned steps, then tap on the “Login” button. You will now see the StrongVPN client window like the one shown in the images below.
The first screen shows the client in its disconnected state. The main client screen has the following components in this state:
- StrongVPN Logo – Company branding.
- Server Name and Number – Shows the server name and server number.
- Optional settings icon – This is the horizontal lines in a circle icon to the right of the server name. Tapping this will display the main settings screen which will then show screens for the individual settings. We will examine these later in this section.
- The connection switch – This is currently dark indicating that it is off.
- Location – The currently chosen connection location (Atlanta, United States), followed by a red warning light.
- Connection status – This says “Disconnected” in red to warn you that your Internet is not secure.
- Social Media Links – Tapping these icons will connect to the Facebook and Twitter page for StrongVPN respectively.
- The Get Support Link – Tapping this will load the StrongVPN support page from their website. This page has their support and billing FAQs, links to their VPN setup guides, and you can also fill out and send a support ticket from here.
- Titles – Titles of StrongVPN’s latest blogs.
Tapping on the switch will start the connection process to the Atlanta server. This is shown in the middle image below where the switch now has a yellow warning tint and the status is shown as “Connecting” in yellow. During this time, you will see messages at the top of your Android device saying authenticating, configuring the VPN server, a dark StrongVPN logo, and others. Also note, the optional settings icon does not appear on this screen.
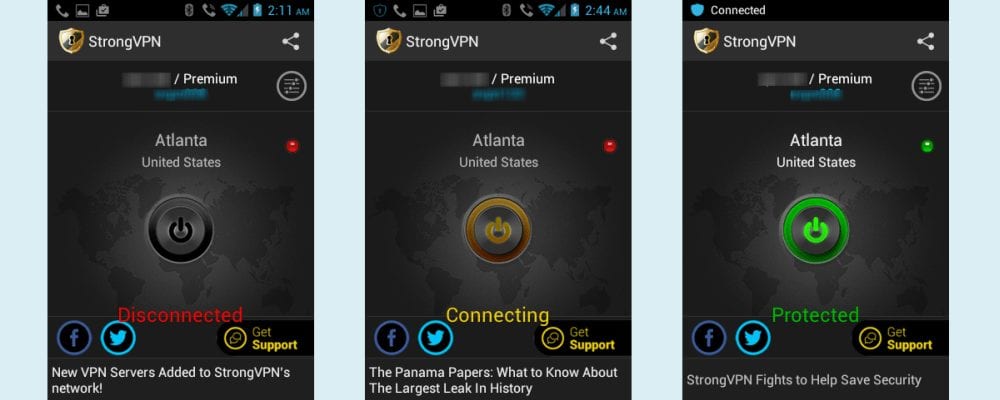
The last screen in the image above shows the client when it is connected to the Atlanta VPN server. The optional settings icon is back. The light next to the location is now green, the switch has a green tint, and the status now says “Protected” in green. Also the StrongVPN logo in the messaging menu is shaded blue with the word “Connected” by it. Connected is then replaced by a key indicating that we are secure. By color coding the screen components, StrongVPN has made it easy to see the status of your connection with just a glance.
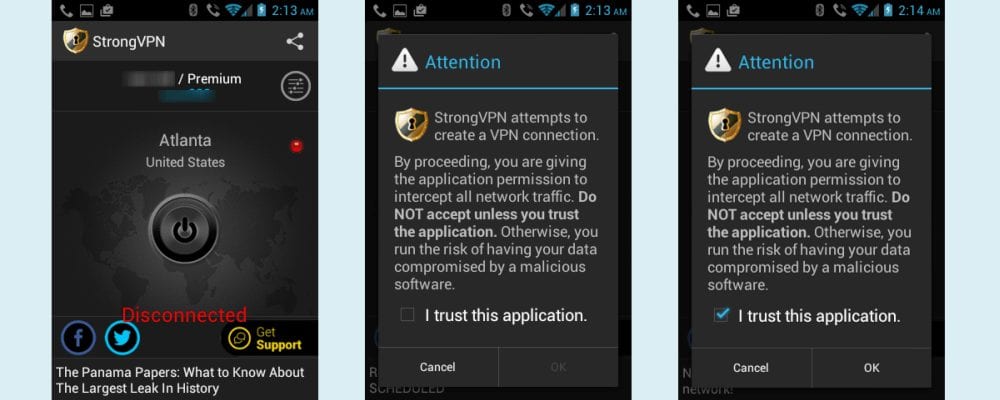
Everytime you connect to the StrongVPN network after you login, you will see a warning message like that shown in the second image below. This is what happened before you received the connection screen in the image above. This is normal. Android is just letting you know that you are connecting to a VPN service and making sure that you trust the source. To continue, you must trust StrongVPN and tap “OK” as we have done in the last image below.
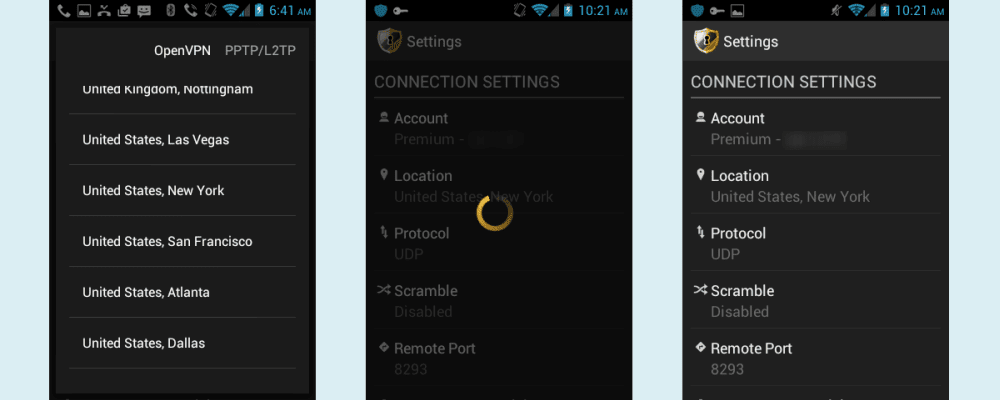
This will then allow you to complete your connection to the Atlanta server as is shown in the first screen of the image below. Tapping on either the location near the top center of this connection screen or the settings icon (horizontal lines with dots within a circle) will bring up the connection settings which is shown in the second screen below. Tapping on location on this screen will bring up a list of locations that you can connect to using OpenVPN.
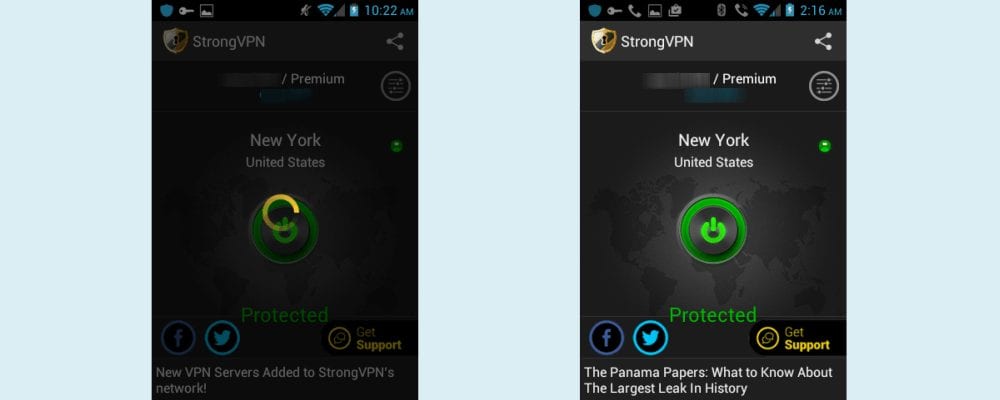
Scrolling down the list and tapping on New York, United States will start the process to switch between the Atlanta and New York servers. This is illustrated in the images below. As you can see the app updates the location in the connection settings as is shown in the last two screens below.
Once the location has been updated, then press the back button on your device which will return you to the main connection screen shown in the first image below. Notice that the app is automatically trying to connect to the new server since it was connected to the Atlanta one before you started your switch to New York. The last image below shows that you have successfully switched between the two servers. Changing servers in this way shortens the time you are not on the VPN while switching servers. Alternately, you could disconnect from your current server, select a different city, and then connect to the new location.
We have looked at how to connect and switch servers using the StrongVPN Android app. Now let us see how to disconnect. Disconnecting is easy, simply tap the connection switch. You will then be prompted with a cancel confirmation message like the one shown in the first screen in the image below. Tap “OK” and you will be disconnected from your current VPN server.
It you have trouble disconnecting, want to cancel a connection before it finishes, or need another way to disconnect, you can tap and drag down on the StrongVPN shield icon in the running apps messaging area at the top of your device screen. Once this screen is opened as shown in the second image below, tap on the “VPN is activated by StrongVPN” area which will bring up the session information screen shown below on the right. Tap disconnect on this screen to complete the process.

The last thing we want to examine in the Android app is the settings that you can change. You have already learned how to use the location menu to change VPN servers. The first screen in the image below shows the settings menu so you can see some of the other connection options that you can control. These include the following:
- Account – This shows your account IDs and is mainly for legacy accounts.
- Location – As you have already learned, this will let you switch servers.
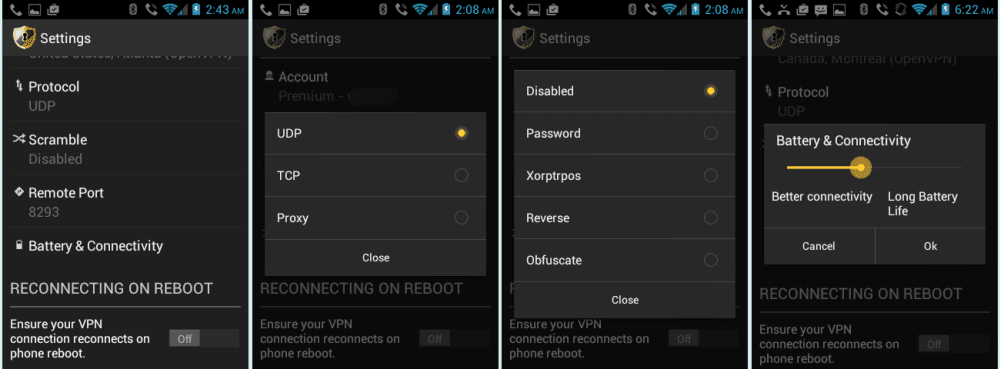
- Protocol – OpenVPN is the only VPN protocol supported by the Android app but you can change how it is implemented as is shown in the second image below.
- UDP – This is the OpenVPN User Datagram Protocol and does not include the overhead of TCP and thus is faster and is the StrongVPN Android app default.
- TCP – This is the Transfer Control Protocol and is good for high latency connections and those which cannot tolerate packet loss. It provides error checking for packet order and loss and resends packets to correct. This is usually slower because of the extra overhead involved in this process. This will not be ideal for streaming.
- Proxy – This is mainly used in countries like China and Iran to help with connection issues and censorship but could be useful for streaming as well.
- Scramble – This is the technology which adds another layer of complexity to the VPN connection between the OpenVPN client and OpenVPN server, making it more likely for the VPN to pass through the network unimpeded. This can help stop deep packet inspection techniques used for censorship by countries like China. It can be implemented in five different ways as is shown in the third screen of the image below.
- Disabled – Do not scramble the data.
- Password – A string (word) is used to perform a simple XOR operation on the packet payload.
- Xorptrpos – This performs an XOR operation, using the current position in the packet payload for the operation.
- Reverse – This reverses all the packet data.
- Obfuscate – This uses a blend of all three methods above and is the most secure.
- Remote Port – This is a remote port that is available for the VPN to use if it needs to. It defaults to Port 8293: a very underused port.
- Battery & Connectivity – This is a slider which you can adjust between better connectivity and longer battery life as is shown in the last screen in the image below.
The last option that you as a user have for the Android app is to set it so that it automatically reconnects when your phone reboots.
The Android app from StrongVPN only supports the OpenVPN protocol which is ok since it is probably the best protocol choice for most users anyway. The app defaults to UDP but you can change it to TCP for longer latency connections or more rural areas. It can also be set to a proxy setting. The app has an advanced feature to scramble your data and help avoid deep packet inspection employed by those who practice censorship of the Internet. More to the point, it makes it easy for you to connect to their VPN network from your favorite Android device. Just a few taps on the screen will have you connected to your chosen VPN server location.